
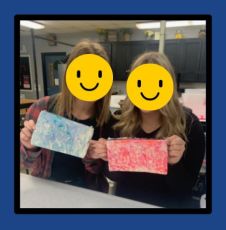
Sharing a Fabric Marbling Project from Amy Harkey, a Missouri FACS teacher. Amy uses this interactive project in her Apparel, Fashions & Textiles class in her unit on Principles of Design as a way for students to demonstrate their understanding of the concepts. Read on to learn more about this cool project!
Set
- This project comes after Amy has taught the Principles of Design.
- Prior to students trying this project, they watch an instructional video from YouTube titled, “Shaving Cream Marbling On Fabric”.
Materials
- Zipper Canvas Bags (affiliate link) (optional)
- Fabric Piece (cotton, linen or duck cloth works best)
- Shaving Cream (cheap from Dollar Tree)
- Plastic Spoons
- Foil Tray
- Painters Tape
- Puff Paint (affiliate link)
- Unused Pencils
- Wooden/Plastic Rulers
- Plastic Bags (store bags)
- Plastic Table Cloths
Instructions
- Direct students to cover the table with a plastic tablecloth and work with partners. And then…
- Shake the shaving cream up and put some on the tray.
- Spread the shaving cream using the spoon making sure to get the edges of the tray or making sure that the work surface will cover your fabric. YOU ONLY NEED A THIN LAYER – NOT THAT MUCH!!
- Gently squeeze a thin stream of puff paint on the shaving cream.
a. 3 colors seem to work the best
b. You decide where to put the colors - With the eraser end of the pencil or spoon (DON’T GO ALL WAY TO THE BOTTOM and hit the tray) Swirl, make lines with the paint and shaving cream
a. DO NOT OVERMIX THE COLORS as you only need to mix to blend them so you can see the distinct colors - Take your piece of fabric and lay it down in the paint/ shaving cream
a. Once you lay it down, you cannot pick it up again. - Rub the fabric all over, until you see the colors starting to seep through.
a. Should take about 30 seconds. - Peel the fabric off the shaving cream
- Put on a plastic bag
- HOLD one end of the fabric and with the other hand, using the ruler, SCRAPE all the shaving cream and paint off – can be thrown in the trash or rinsed down the drain.
- Let dry
- IRON once it is dry to set the color; (let dry overnight).
- After their project has dried and been set, students complete an evaluation and turn it in to be graded. The teacher will then complete the final evaluation on the project.
- Amy noted that this lesson took 3 periods to do and her students really enjoyed this project!
Attachments
