
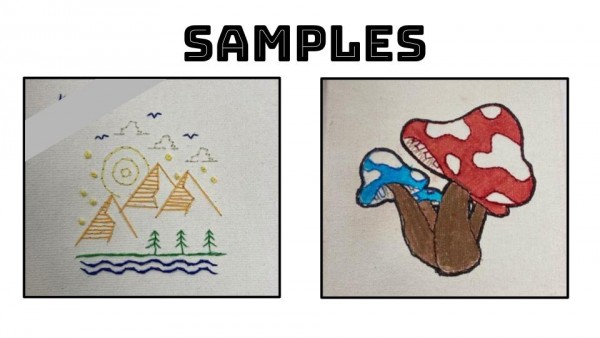
If you teach an interior design, textile or sewing class, you are going to love this Canvas Stitching Project shared by Katelyn Propper. In this project, inspired by something she saw on Facebook, students get to choose a design, color plan and then hand-stitch it culminating in a beautiful canvas that is display worthy in the home or classroom! Read on to learn more…
Set
- Prior to this project, students have spent time learning different hand stitching techniques. They hemmed by hand (6 ways) and completed a cross stitch project. To give students additional practice on hand stitching, this project was assigned.
Materials
- Canvas (6 x 6) (affiliate link)
- Embroidery Floss
- Scissors
- Pins & Needles
- Google Jamboard App
Directions
- Notes: Katelyn uses this project in her Fashion and Textiles Pathway class and gives students 2-3 classes (block schedule) to complete.
- Katelyn recommends doing one on your own first. It’s easy but when the picture is taken away from the canvas some of the lines can be hard to find. It’s easier to understand if you do one yourself. She tells students to keep their picture to have as a reference and reminds them that they are doing outlines of the pictures and not filling them in like they do with cross stitch. In that way it’s different. Early in the unit, Katelyn has her students complete a hand sewing paper and makes them do a curvy line where they go forward and then back through the middle of the previous stitch to make a single line. Reminding students that they will have to go forward before they go backward is helpful since they can’t go through the same hole they went down in.
- Step by step instructions and the grading rubric are assigned to students via Google Jamboard Slides (see below).
- Students begin by selecting a picture they would like to sew that can be printed out.
- After cutting the picture out, they tape it to the canvas.
- Using pins, students poke holes along the lines they will sew, making sure they are not too close or too far apart.
- Students select at least three embroidery floss colors they would like to use and begin stitching.
- When finished stitching, students add their names and submit for grading.
Attachments
Similar Lessons
