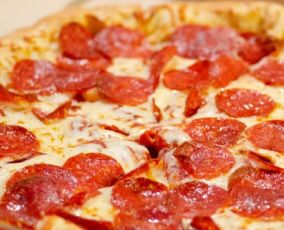
The pizza lesson and lab is a favorite among my students because, for most of them, this is a staple meal in their diet! This lesson has a variety of interactive activities as well as some lab options. It’s also a great way to demonstrate using yeast with success!
Set
- Students are given 3 minutes to complete a Thin Slide of their favorite pizza. Thin slides is an Eduprotocol activity where students have 3 minutes to add one word and one picture to their assigned slide.
- When time is up, we go through the slide show quickly and students share their favorite pizza. This is a quick and easy way to see the diversity in their selections. I include a blank template below so you can add your own students, but also include the completed one my students did so you can see the variations.
Materials
- iPads or Laptop
- Screen & Projector
- Colored Pencils
- Lab Ingredients
- Eduprotocols Field Guide Book 2 (Amazon Affiliate)
Activities
- Students take notes and learn the parts of pizza including examples along with the origin and sequencing of building a pizza from the Pizza slide show (see attachments)
- The pizza information is reinforced by having students complete the “Annotated Pizza Parts & Ingredients” activity. I do allow my students to work individually or with one partner and they may utilize the internet if they need help with an unknown ingredient. You can either go over this as a class or collect for a grade.
- Next, we discuss the various pizza types such as: Neapolitan, Chicago Deep Dish, Detroit Style, New England Greek Style, New York Thin Crust, St. Louis Style, New Jersey Style and California Style.
- Students are then assigned a pizza type to learn more about as they create the “Pizza Type Post Card Project” using a Google Slide Post Card Template. See below for attachments.
- After students share their pizza type postcards with the class, we learn how to make pizza crust from scratch, using yeast.
- To help students understand what’s involved in making homemade yeast pizza crust, I show them Alton Brown’s Good Eats episode titled, Flat is Beautiful which is available on Amazon for a few dollars as an individual episode (Amazon Affiliates).
- Now it’s time to make the pizza! For me, this is a three day lab due to class periods being only 43 minutes long.
- Day 1 is used to make the dough which gets refrigerated in a bowl covered with plastic wrap.
- Day 2 is used to spread & parbake the crust. Once cooled for a few minutes, students add toppings, cover and refrigerate overnight. There are options here: you can either give students a predetermined topping such as pepperoni or just plain cheese which is what I did, or you could have a toppings bar set up with leftover items you have in small amounts in order to use them up.
- Day 3: Students bake and eat their homemade pizza!
- Another optional lab is to have each kitchen group make a different pizza type from their postcard project. This way they would get to sample three but only prepare one.
Attachments
- Favorite Pizza Thin Slide–Completed Sample (PPT)
- Favorite Pizza Thin Slide–Blank Temple (please make a copy)
- Pizza Notes–Parts & Sequence (PDF)
- Pizza Notes Form (PDF)
- Annotated Pizza Parts & Ingredients (PDF)
- Pizza Types PostCard Project (PDF)
- Pizza Postcard Blank Template (please make a copy)
- Pizza Crust Recipe & Lab Sheet (PDF)
Similar Lessons
- Fusion Cooking
- Pizza Competition
- Frozen Pizza Comparison, Ingredient Investigation & Makeover Challenge
Photo by Alan Hardman on Unsplash

3 comments for “Pizza Lesson & Lab”