Thank you, Tracey Eatherton of Ste. Genevieve High School, Ste. Genevieve, Missouri for sharing this FUN, educational and interactive lesson! If you teach parenting or child development, especially at this time of year, then the Panicked Pumpkins: Labor and Delivery Project is a must do activity! It also makes a great display if you have a showcase you maintain in your school! Read on to see what’s included…
Background
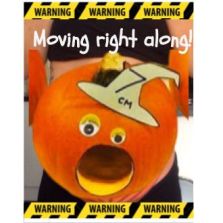
- The inspiration for this lesson comes from an article titled “Horrifying pumpkins show stages of dilation during childbirth”.
- This lesson is intended for a Parenting/Child Development class, for use in the unit covering labor and delivery
Set
- Ask students to think about what they have heard other people say about labor and delivery. Have them add these perceptions to a digital sticky-note site, such as Padlet or Note.ly, or simply brainstorm the list on the board or projection screen
- As students respond, ask for clarification as needed, and probe them as to where they heard this information.
- Ultimately, one would expect pain and contractions to be described as an important piece of labor and delivery. Once those responses are noted, transition the discussion into the question of why contractions cause pain and what the purpose of contractions really is.
Materials
- Padlet or Lino-it, Note.ly or a chalkboard or whiteboard
- Water based markers
- 10 pie-sized pumpkins
- 10 paper plates, pieces of cardstock/posterboard
- Black and white foam, posterboard, cardstock, or felt
- Assorted foam, posterboard, cardstock or felt scraps
- 10 metric rulers
- 10 baking pans
- Individually wrapped Life-Savers candies
- Paper towels
- 10 safety carving knives (affiliate link)
- 10 spoons
Activities
- Give each student an individually wrapped Life Saver candy. Ask them to enjoy that candy, but to pay close attention to how the shape changes as the candy dissolves. Ask if anyone notices that not only does the hole in the middle get bigger, but the entire candy gets thinner. Explain to the students that the “getting thinner” result is similar to the change called “effacement”, when the expectant mother’s cervix gets thinner during contractions.
- Provide each student with a metric ruler. Ask them to find the 1 cm marking, and then the 10cm marking. Ask the students if anyone knows what centimeters have to do with labor and delivery? Explain that these two measurements represent the cervix before dilation occurs and the end of dilation. Explain that the painful contractions the mother feels are actually changing the thickness (effacement) and the diameter (dilation) of the cervix so that she can effectively push the baby through the birth canal.
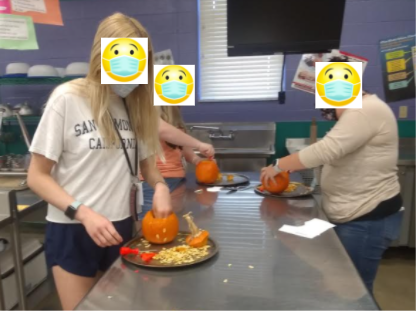
- Explain to the students that they will be helping you create a visual with pumpkins to represent the changes to the cervix as full dilation takes place.
- Divide students into 10 equal groups, or have some students work independently. Explain that each pumpkin’s “mouth” will be cut to a size that represents one of the steps in dilating from 1cm to 10cm. So, each mouth will have a different size measurement. Ask groups to measure and draw a circle on the cardstock, posterboard or paper plate to represent their assigned measurement. Then cut the circle out, and line them up to see if there are any inconsistencies.
- Once circles are accurate, groups trace the circle onto the pumpkin with a water-based marker. These will smudge, but they will also wash off. S tudents will use the carving knives (the safety ones) to only cut out their circles.
- After cutting the circles, each group will cut a hole around the stem at the top in order to clean the pulp and seeds out of the pumpkin. Use the baking sheet or tray to catch the pumpkin waste as the students work.
- Once the pulp and seeds are removed, students will wipe the outside of their pumpkin. Students will use the pattern provided to create the eyes for their pumpkins from felt, posterboard, cardstock or craft foam. Glue the eyes together, then glue to the pumpkin.
- Groups will then design a hat for their pumpkin from paper, craft foam, cardstock or posterboard. Teams will indicate the size of the mouth measurement on their hat; attach hats to pumpkins.
- When finished, line the pumpkins up in order and have students reflect on the changes necessary in order for the baby to be delivered. Suggestions include: Did you know the cervix had to change that much? What do you think would happen if the mother tried to push the baby before dilation was complete? What would the doctors or midwives do if the mother failed to fully dilate? What questions does this generate for you? Finally, ask the students to complete the “Panicked Pumpkin” reflection sheet (in the slide deck).
Attachments
- The Panicked Pumpkins Lesson Plan (please make a copy)
- The Panicked Pumpkin Google Slide Deck (please make a copy)
- Pumpkin Eyes Pattern (please make a copy)
- Panicked Pumpkin Reflection Sheet (please make a copy)
Helpful Resources
- Cervix Dialation Chart: The Stages of Labor
- Cervix Dilation During Labour and Birth
- Cervical Dilation Easel Display
- Cervix Dilation Chart: The Stages of Labor Explained in Pictures
Similar Lessons
