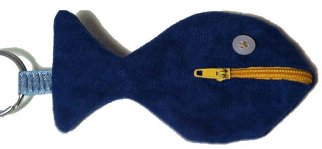
 This weekend I was in Boston and saw the cutest change purse. I looked it over and said, “I can make this!” I’m going to have a school of fish soon here on my table because they are so cute and easy to make! So here it is my example with directions, patterns, etc. Enjoy!
Time Frame: 1 period
Objective
- Review basic sewing skills such as pivoting, clipping, zippers, buttons, turning things right side out with corners, etc.
Materials
- Scrap Fabric (thicker works the best)
- 1 Zipper
- 1 Button
- Thread
- 2” Piece of Ribbon folded & pressed in half
- 1 Keyring
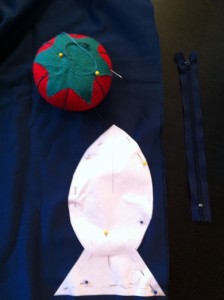
1.Cut out the pattern piece
2.Pin the patterns on single layers of fabric and cut on the solid lines
3.Sew in the zipper- top of the zipper on the “hinge” of the fish’s mouth
4.Sew on the button above the zipper
5.Put the right sides together putting the ribbon ends in the middle of the fishes tail, loop facing in
6.Starting at the top of the fishes head sew the way around using the side of the presser foot as a guide.
7.Leave an ope ning so you can turn it right side out
8.Before turning trim edges/clip corners
9.Blind stitch opening closed. Press.
10.Attach key ring
Extensions
- If you have students that will finish this project too quickly suggest that they embroider the front of the fish before sewing it together. The fish could have stripes, polka dots, eye lashes or brows, a monogram, etc.
Attachments


1 comment for “Fish Change Purse”