Had I asked students years ago if they cooked much with cast iron, I would have gotten a lot of positive responses. Today, not so much! Because many students don’t have this experience, I decided to teach them about “Cast Iron Cooking” so they could see the similarities and differences to regular cookware as well as the variety of foods that could be prepared with it.
Set
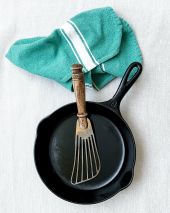
- Kick off the lesson with the bell-ringer showing an image of cast iron cookware along with prompts asking students if they know what type it is, whether they’ve used it and what they made if they have.
- Introduce and explain the various stations students will visit to learn more about cast iron cooking.
Materials
- Cast Iron Frying Pans (affiliated link)
- Lab Resources
Activities
- Station #1: Students scan the QR Codes linked to specific web-resources where they will explore the myths vs reality of cast iron along with some things they didn’t know as they complete the corresponding activities. If you don’t want to use QR Codes, simply print off the resources and place them at the station.
- Station #2: Students scan the QR Code to learn the basic rules for cast iron (scroll down to how to use cast iron) as they complete the corresponding chart. If you don’t want to use QR Codes, simply print off the resources and place them at the station.
- Station #3: Students do the “Season” Flash Slide where they create a SINGLE flash slide that answers the prompt and includes the below criteria and attach to Google Classroom when finished.
- What does it mean to season a pan? Flash Slide
- Provide an explanation that answers the prompt
- List the steps—there should be around 5
- Provide the name of the resource (website or video) and hyperlink to access the steps you found.
- Include an image related to your response.
- Station #4: Again, students scan the QR Code to learn the Do’s & Don’t of Caring for Cast Iron. After reading each statement, students highlight in PINK if the statement represents something that should be done with cast iron. Highlight in GREEN if the statement represents something that should be avoided with cast iron. If you don’t want to use QR Codes, simply print off the resources and place them at the station.
- After the station work is completed, it’s time for students to work with the cast iron in the lab. The beauty of cast iron, is that it can be used in the oven as well as on the stove top. A fairly quick lab that students prepare is a Hamburger Hash. It can easily be served as a main dish for lunch or supper or it can be topped with an egg and served for breakfast, so there’s a lot of versatility.
- Students complete the pre-lab questions using the provided recipe for Hamburger Hash before completing the actual lab sheet. This lab can easily be completed in a 43 minute class period.
- To conclude the mini-unit on cast iron cooking, students fill out a 3-2-1 exit slip. Exit prompts I use are:
- 3 Things you liked about cooking with cast iron…
- 2 Things you disliked with cast iron cooking…
- 1 Concern or problem you had/have with cast iron cooking…
- Note: If you have a block schedule or even 50 minute classes, another great cast iron recipe that illustrates both stove top and oven cooking would be the Cast-Iron Skillet Chicken Thighs from Dani Spies. I have had great success with this recipe at home, but it’s a bit too long to do in one 43 minute class period.
Attachments
- Bell-Ringer Slide
- QR Codes for Stations
- Station #1
- Station #2
- Station #3
- Station #4
- Hamburger Hash Pre-Lab Questions & Recipe
Similar Resources
- Biscuit Brigade (biscuit demo)
Photo by Rayia Soderberg on Unsplash
